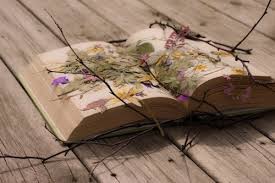
Would you agree that there is something enchanting about pressed flowers? They dazzle the eye with vibrant color and exquisite detail, all the while evoking gentle feelings of nostalgia. Perhaps best of all, pressed flowers cost nothing.
Preserve Your Favorite Spring Flowers by Pressing Them
Do you love flowers? Do you hate to see things go to waste? Are you great at crafting and making things beautiful? If so, our pressed flower jewelry box project is for you. It is the perfect Springtime craft, and also makes a thoughtful gift.
Before you begin making your jewelry box, gather the needed materials:
- Small wooden box
- 2 pieces of white paper
- Acrylic paint (your choice of color)
- Small paintbrush
- Elmer’s glue
- Several blooms of your favorite Spring flower (small blooms work best)
- Krylon anti-UV clear acrylic sealer (comes in a spray can)
- A hardback book
Altogether, these materials should be very inexpensive.
Directions for Making Your Pressed Flower Jewelry Box
Once you have gathered your materials, you are ready to get started making your pressed flower jewelry box. Follow these directions to get a beautiful result:
- Carefully place your live flower blooms onto one piece of white paper; do not let the blooms overlap. Open your hardback book and place the white sheet loaded with blooms into it. Cover the blooms with the other sheet of white paper and close the book firmly. Now comes the hard part: leave the book alone for at least a week; this is how long it takes for the flowers to become thoroughly pressed and dried.
- In the days you are waiting for your flowers to dry, paint your wooden box with the acrylic paint you chose. You may need to apply 2 coats of paint. White is the perfect showcase color for your vibrant pressed flowers. Allow box to dry totally.
- After the week long period, open the hardback book and carefully remove the dried flowers with tweezers. They will be as thin as tissue paper, so be very gentle.
- Using tweezers, arrange the pressed flowers into a design of your choice on top of the box. Be as creative as you desire. Remember, this is your creation!
- After your flowers are arranged atop the box, carefully lift each dried bloom and dot tiny amounts of school glue (use a toothpick to do this) on the backside of the flowers. Then, lay the flowers on the box and gently press down on them. Do this until all your dried flowers are glued in place. Let arrangement dry.
- The last step is to spray your completely dry craft with Krylon clear acrylic sealer. Be sure that the top of your jewelry box is open when you do this; otherwise, the spray will glue the
 box’s lid shut. You may want to spray another coat of sealer after the first coat is dry. Allow box to dry. Your Springtime pressed flower jewelry box is now finished and ready to be enjoyed!
We would love to see your finished product. Please share a photo of your Springtime craft with us on Twitter (https://twitter.com/segmation).
Is there a specific craft you love to make that uses pressed flowers? Please share with us in the comments section below.
Read more Segmation blog posts about art and color:
Paint by Number – The Original DIY Project
Colorful Flowers to Plant this Spring
Easy Ways to Prepare Your Home for Spring
Be an Artist in 2 minutes with Segmation SegPlay® PC (see more details here)
Join us on FacebookSegPlay® Mobile iTunes now available for iPhone and iPad


Reblogged this on sondasmcschatter and commented:
LOVE THIS——–